Node bookmarks system to save bookmark for all type of nodes. With support of flags edition, saving the bookmark view in the current hip file or in an external .bkm file to share it easily.
Use hotkeys to add or remove bookmarks from selected node. Double click on a bookmark to focus and select the node in any linked network view. Switch easily between node network types.
Compatibility: Houdini 16, 16.5, 17.0, 17.5, 18.0, 18.5, 19, 19.5, python 2&3 builds


Go to you $HOME/Houdini16.0 folder ( for instance, on windows: C:\Users\%USERNAME%\Documents\houdini16.0, on MAC OSX it would be: ~/Library/Preferences/houdini/16.0 ) and extract HoudiniNodeBookmarks.zip in here ( with "extract here" command ). The zip file contains:
scripts\python\HoudiniNodeBookmarks folder, the main python module.
python_panels\HoudiniNodeBookmarks.pypanel, the python panel file.
toolbar\NodeBookmarks.shelf, the toolbar ( shelf ) to be able to set up hotkeys.
config\Icons\HoudiniNodeBookmarks, the icons.
Configure hotkeys
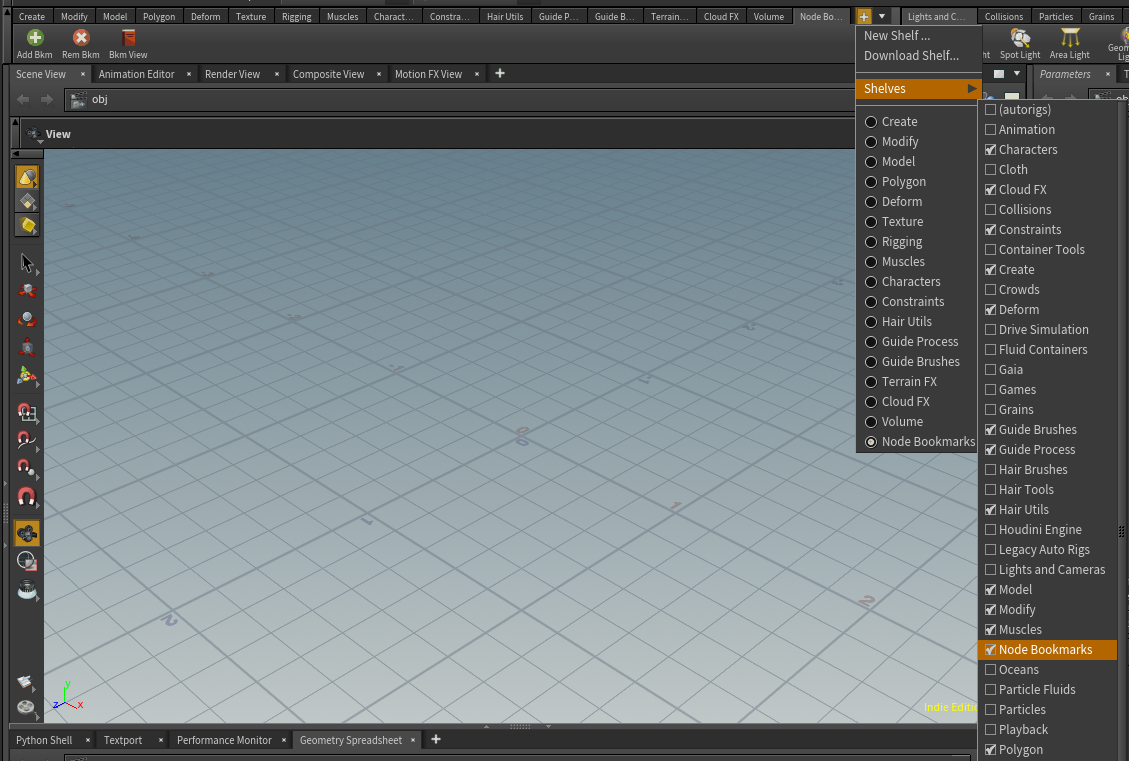
Add a Houdini Node Bookmarks shelf tool:
Then right click on "Add bkm" tool or "Rem bkm" tool to set up hotkeys to add / remove bookmark from selected node. You can also add hotkeys to show bookmark ui (Bkm view).
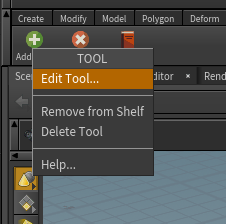
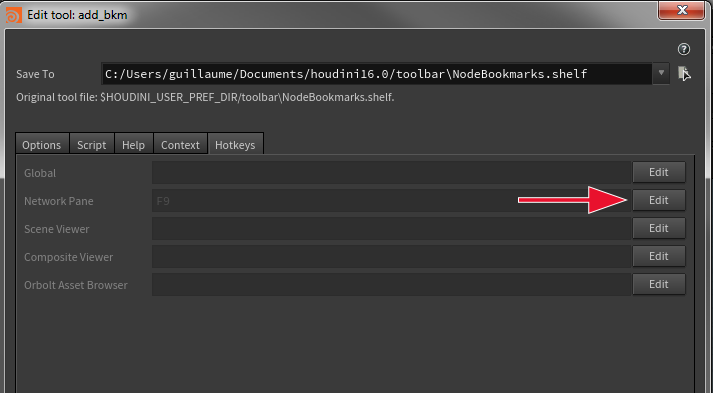
Edit tool, select hotkeys for network pane:
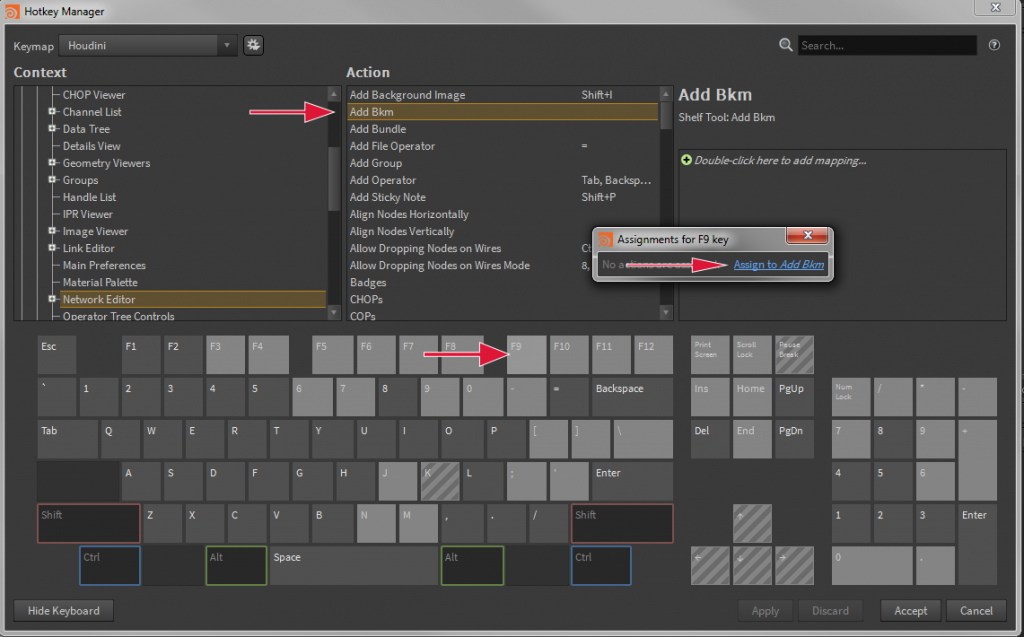
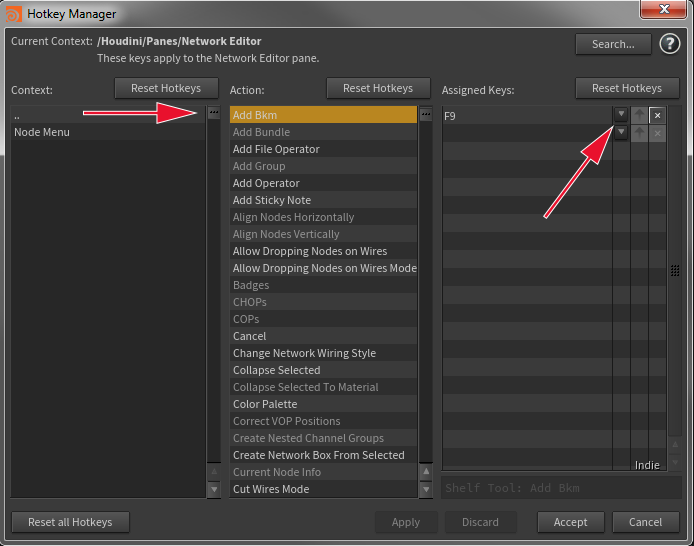
Update the assigned key(s):
Houdini 16.5:
Houdini 16.0:
Any troubles installing the tool ? send email to: support@cgtoolbox.com
Add Houdini bookmarks panel:
Once the script it properly installed, you can add the Nde Bookmarks panel with the normal add panel button. If you add a bookmark while the node bookmark is not opened, a floating panel will be created.


Add a bookmark:
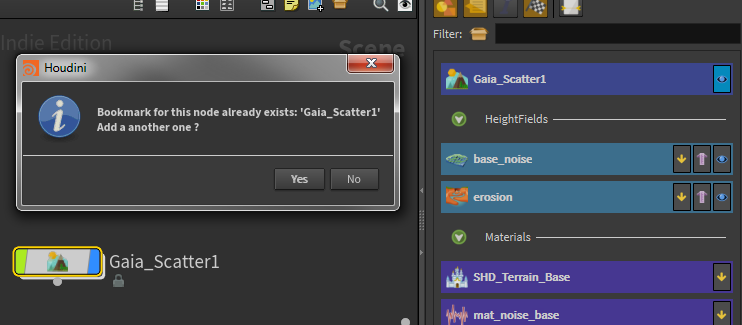
If you have set up keyboard shortcuts ( see "install" page ) for add or remove bookmark, you can add one bookmark by pressing that hotkey. If not, you can add a bookmark with Options => Add bookmark. It will be added to the Node Bookmark panel. If a bookmark of the selected node already exists, a message will be prompt:
You can reorder your bookmarks with drag and drop.
If you double click on a bookmark, the node will be selected and the network view will focus on the node, the icon / name will be displayed briefly on the top left corner of the affected network:
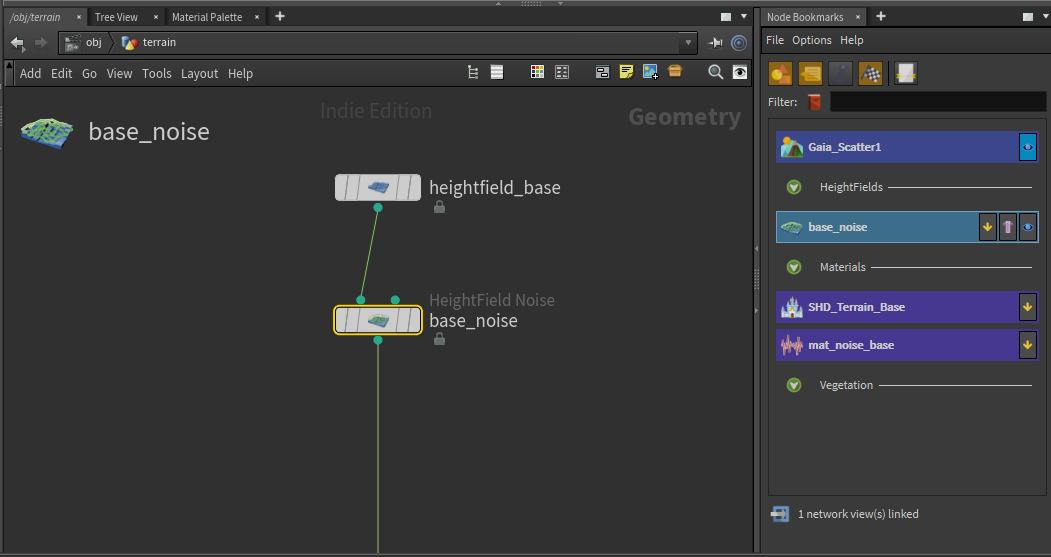
On the bookmark widget tooltip you will see the path of the node, you will see it as well in the status bar at the bottom of the panel.
Node flags:
![]() You have the possibility to edit node flags from a bookmark, bypass, template and display flags are supported. If you change a flag on a node itself, the flag on the bookmark will be updated accordingly,
You have the possibility to edit node flags from a bookmark, bypass, template and display flags are supported. If you change a flag on a node itself, the flag on the bookmark will be updated accordingly,
Right-click menu:
By right click on a bookmark, you can open the bookmark options menu. Where you can change the Label of the bookmark, its color as well as the background color. If you set the current BG color as default, all the next bookmarks from the same node type of this one will be created with that color as background color.
It is also here where you can delete a bookmark.
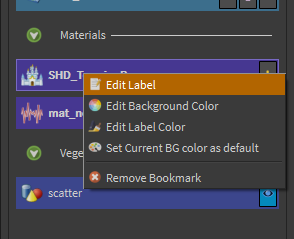
You have the same menu for separator item ( see "Separators" ) where you can change its label as well as all its children label and background colors.

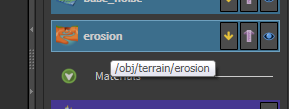
Deleted bookmark's node:
If you delete a node saved in a bookmark, the bookmark will be disabled, unless the "auto delete bookmark" option is set ( see "Options" menu ).
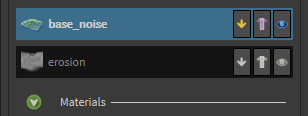
the node "erosion" was delete and the bookmark is now disabled.
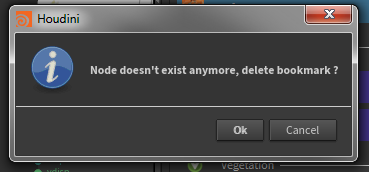
If you double click on a disabled bookmark, a message will be prompt to ask you if you want to delete the bookmark:
Separators
By clicking on the right icon of the display toolbar: ![]() you can add a separator. It can be added also by drag and drop.
you can add a separator. It can be added also by drag and drop.
A separator will collapse / expand all the bookmarks bellow it ( until another separator is found ) by clicking on the green arrow on the left. You can move a separator by drag and drop. If the separator is collapsed during the drag and drop, all the bookmarks under the separator will be moved along.
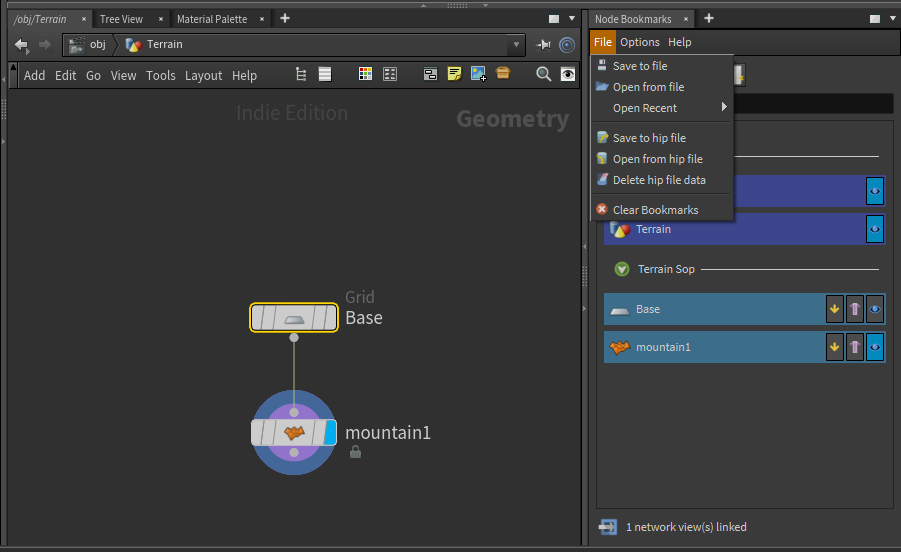
File menu
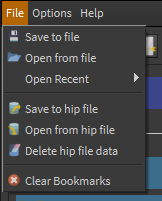
Save / Open file. You can save the current bookmarks in a separate .bkm file and load it back in you session.
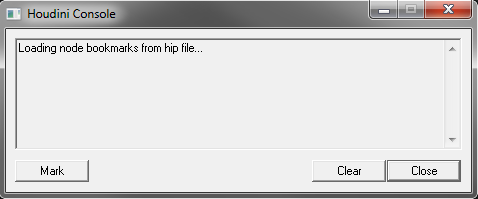
Save / Open from hip file. You can save the current bookmarks in the current hip file session data. Warning, this will not save the hip file for you. When you open the node bookmark panel, the tool checks if any hip file data is saved, if yes, it loads them:
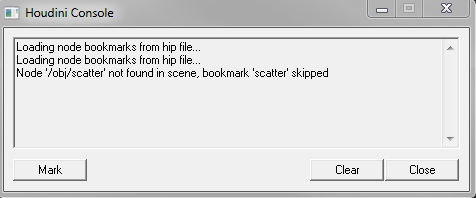
If one or multiple nodes don't exist anymore, they will be skipped:
You can clear the hip file data with "Delete hip file data", this will not save the hip file for you.
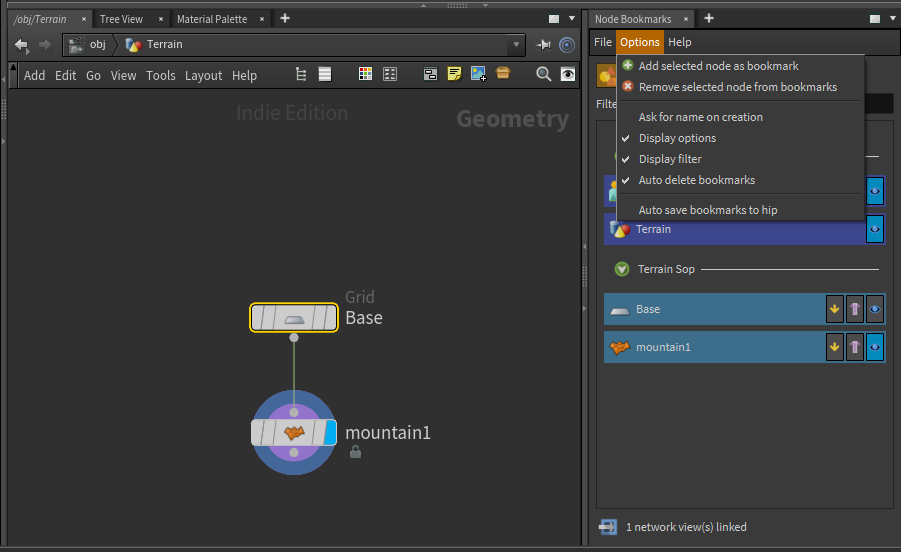
Options Menu

You can create / delete bookmark from selected node.
Display options:
You can show / hide these parts of the ui:
Display options: Toolbar where you can show / hide bookmark's icon, label or node's type as well as node flags. This is also where you can create separator be either drag and drop or click.
![]()
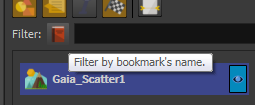
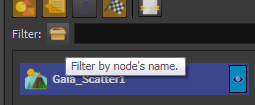
Filter, where you can filter the bookmarks according to either its node name or bookmark label:
With the option "Auto delete bookmarks" when you delete a node which was saved in a bookmark, the bookmark will be removed instead of disabled.
Auto save hip file data: if set to True, each time you remove or add a bookmark, the bookmarks will be saved in the hip file data automatically. This will not save the hip file for you.
Help Menu
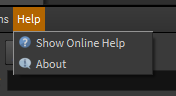
This where you can show informations about the script ( current version ) and open this web page for documentation.
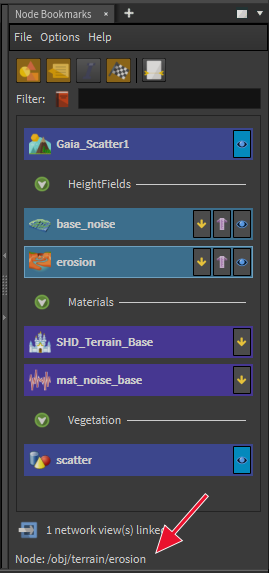
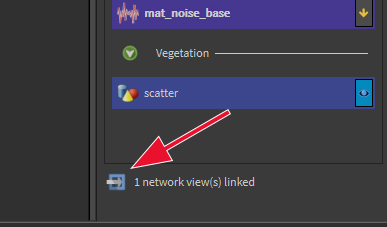
Link network view:
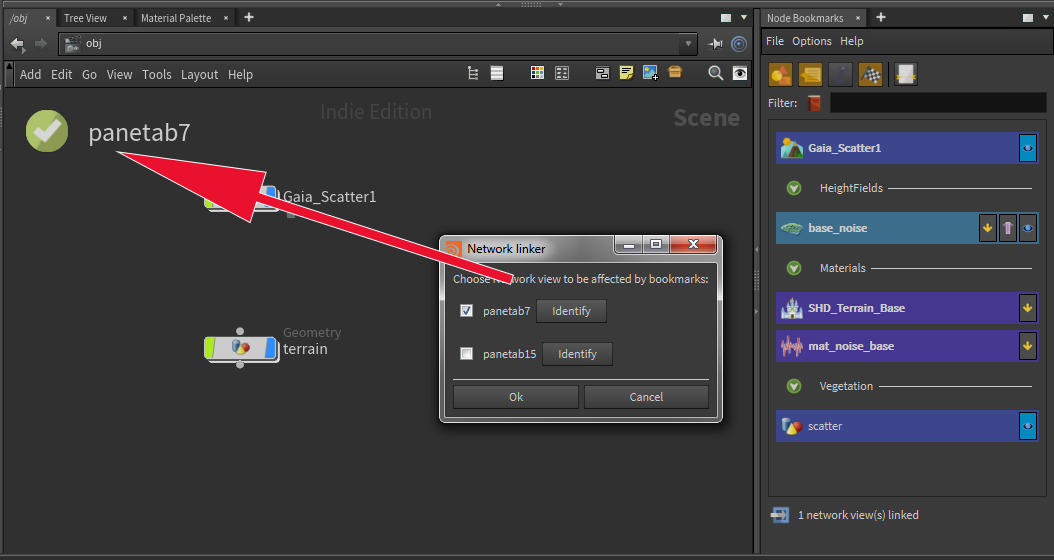
On the bottom part of the panel, you can see a button to link a network view to the bookmark panel. By default the first network view found in the desktop will be linked. When you double click on a bookmark, only the bookmark view(s) linked will focus the node saved in the bookmak.
When you click on the button a dialog will be opened to ask you which network view you want to link to the bookmark system. You can identify the network view by clicking on the "identify" button, a message will be briefly prompt on the top left corner of the network view.
You need more support, have feedback or issues ? send email to: support@cgtoolbox.com